MTV VMA 2021
Client: MTV Role: Motion Designer, Technical Artist
Project Overview
STATE Design tasked me with designing an easily manageable system/set-up using Adobe After Effects for MTV VMA 2021. The goal was to enable MTV’s team to dynamically resize a 3D render of a picture frame, ensuring that it could accommodate versioning deliverables with varying aspect ratios or dimensions without the need to rely on the 3D artist for minor changes. This would eliminate the back-and-forth approval process, freeing up MTV’s team to focus on designing and animating.
Solution
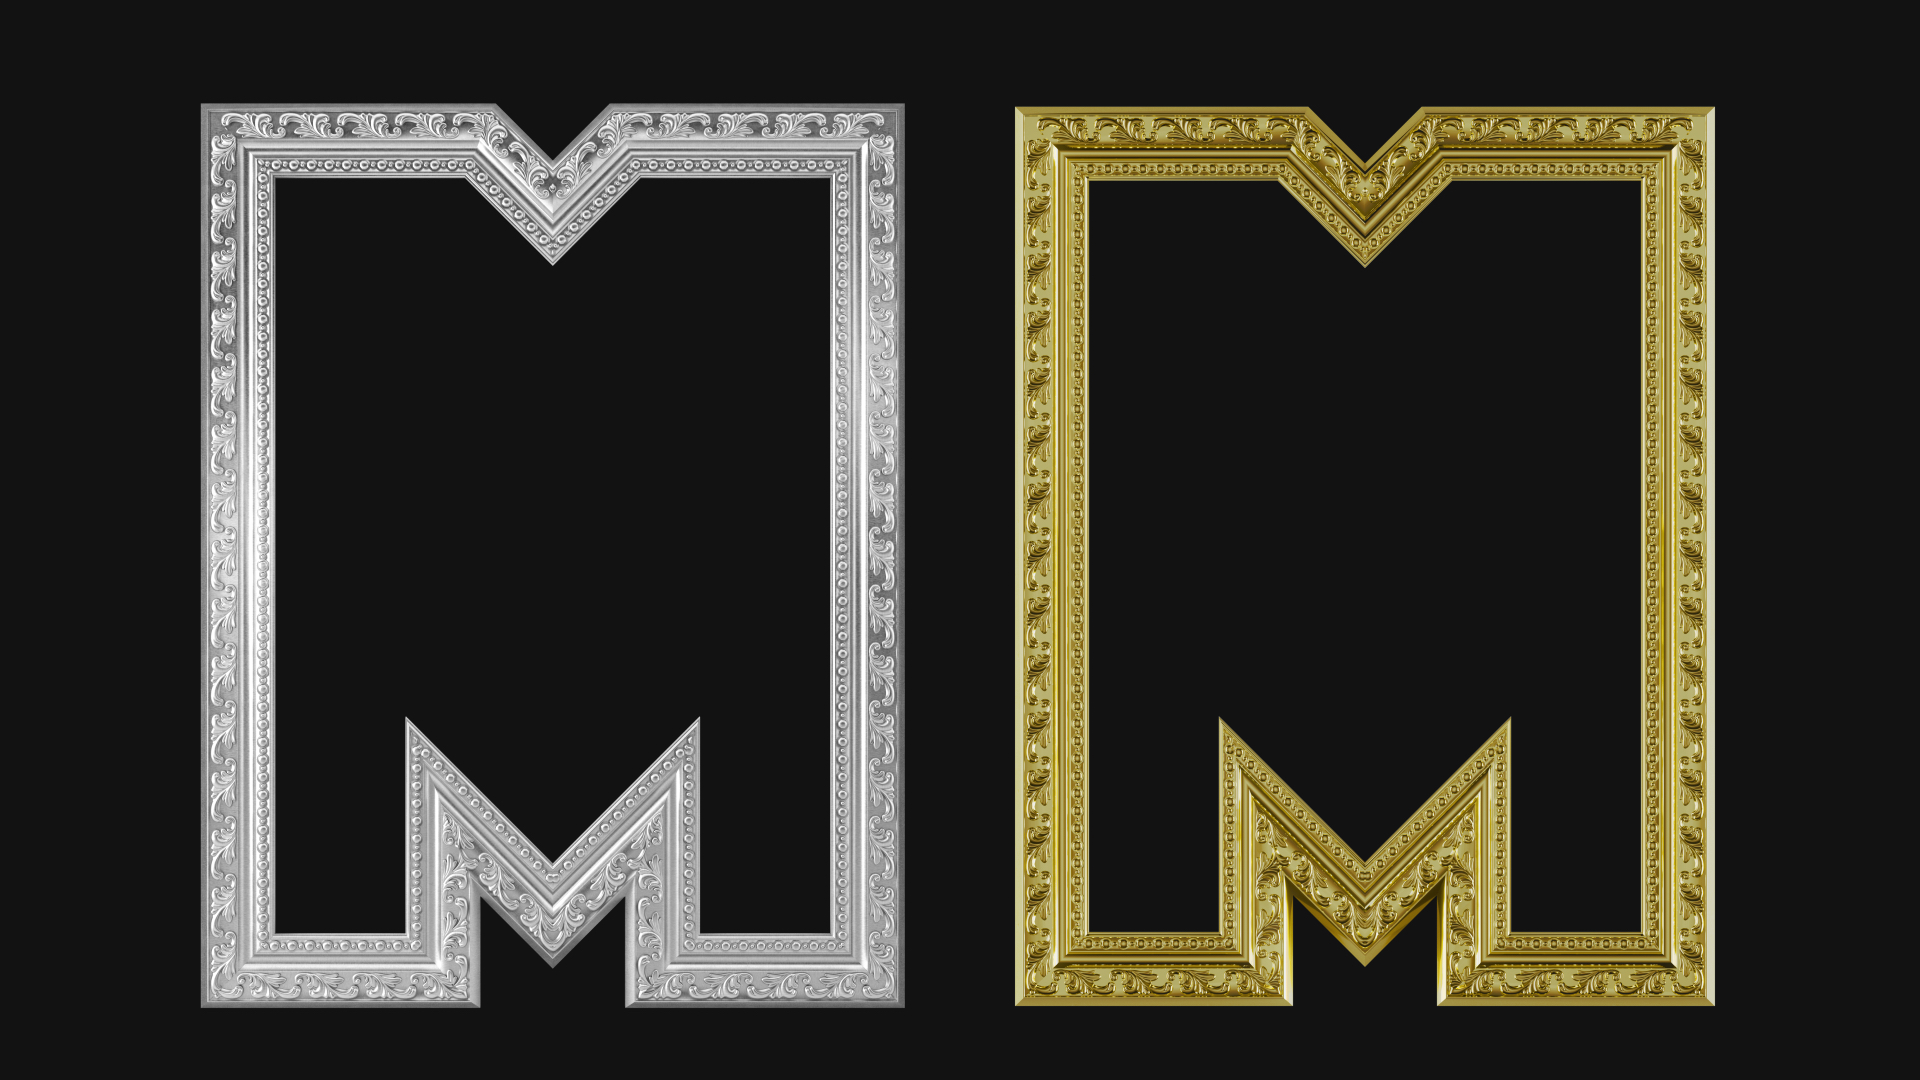
To achieve this, I utilized Javascript expressions to create the “M” shape path, which allowed me to position the frame’s various parts around it. Additionally, I implemented the Reptile effect to repeat the frame when resized. This procedural setup was executed solely in After Effects using expressions, excluding the 3D render created by 3D Designer/Animator Lamek Felix in Cinema 4D.
Toolkit
Functionalities
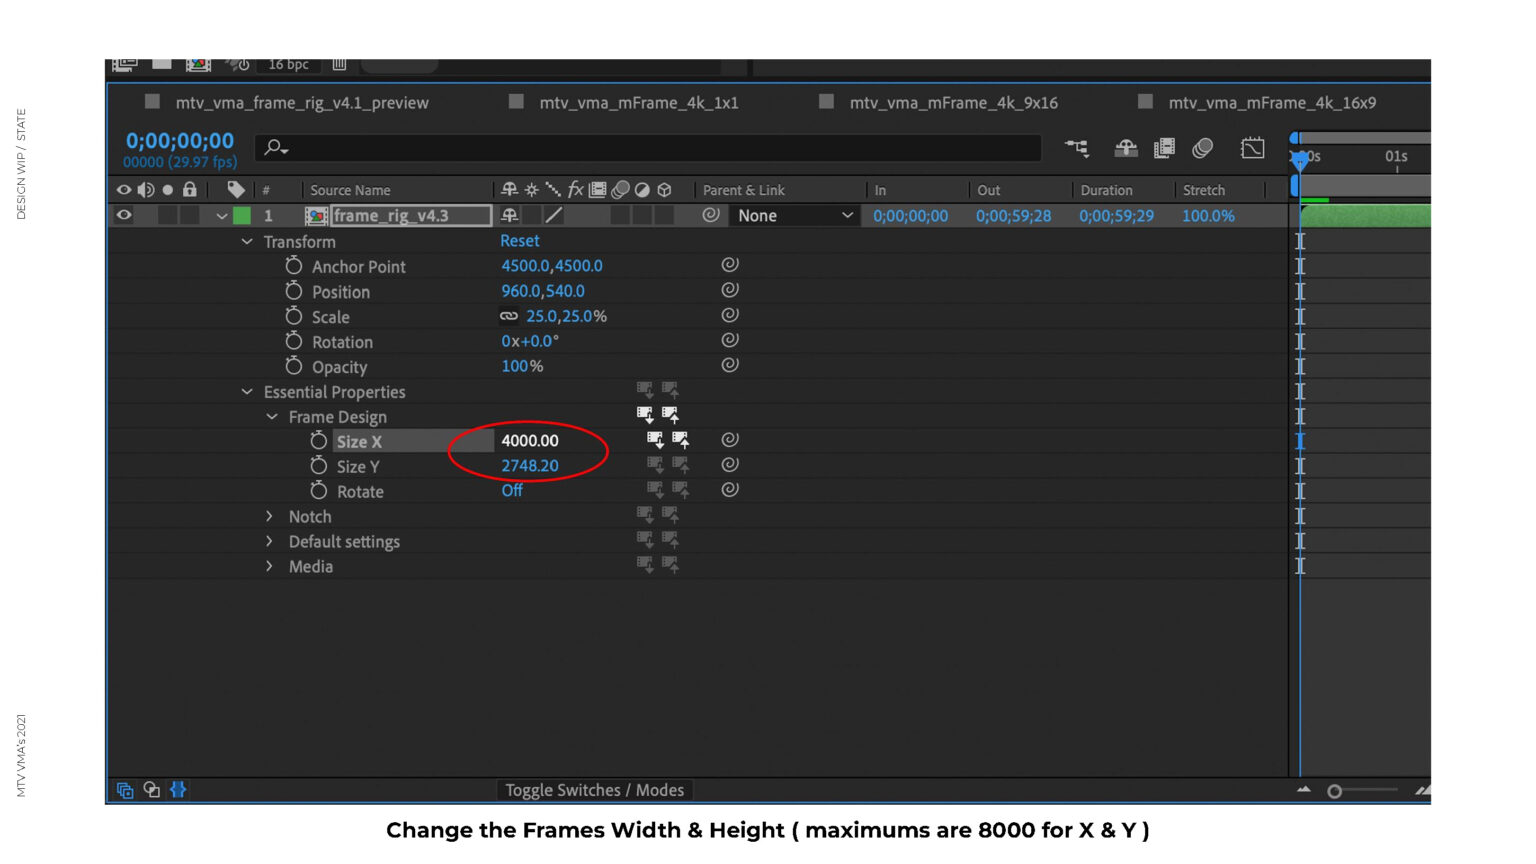
- Resizing of the frame with a minimum frame size: 1500 x 1500, and maximum frame size: 8000 x 8000.
- Placement of the ‘M’ notches — allowing them to slide to other parts of the frame and retain to angles and proportions even when the frame scales/shifts.
- Rotation of frame — The frame can be rotated with a checkbox control in case you want to have the notches on the sides.
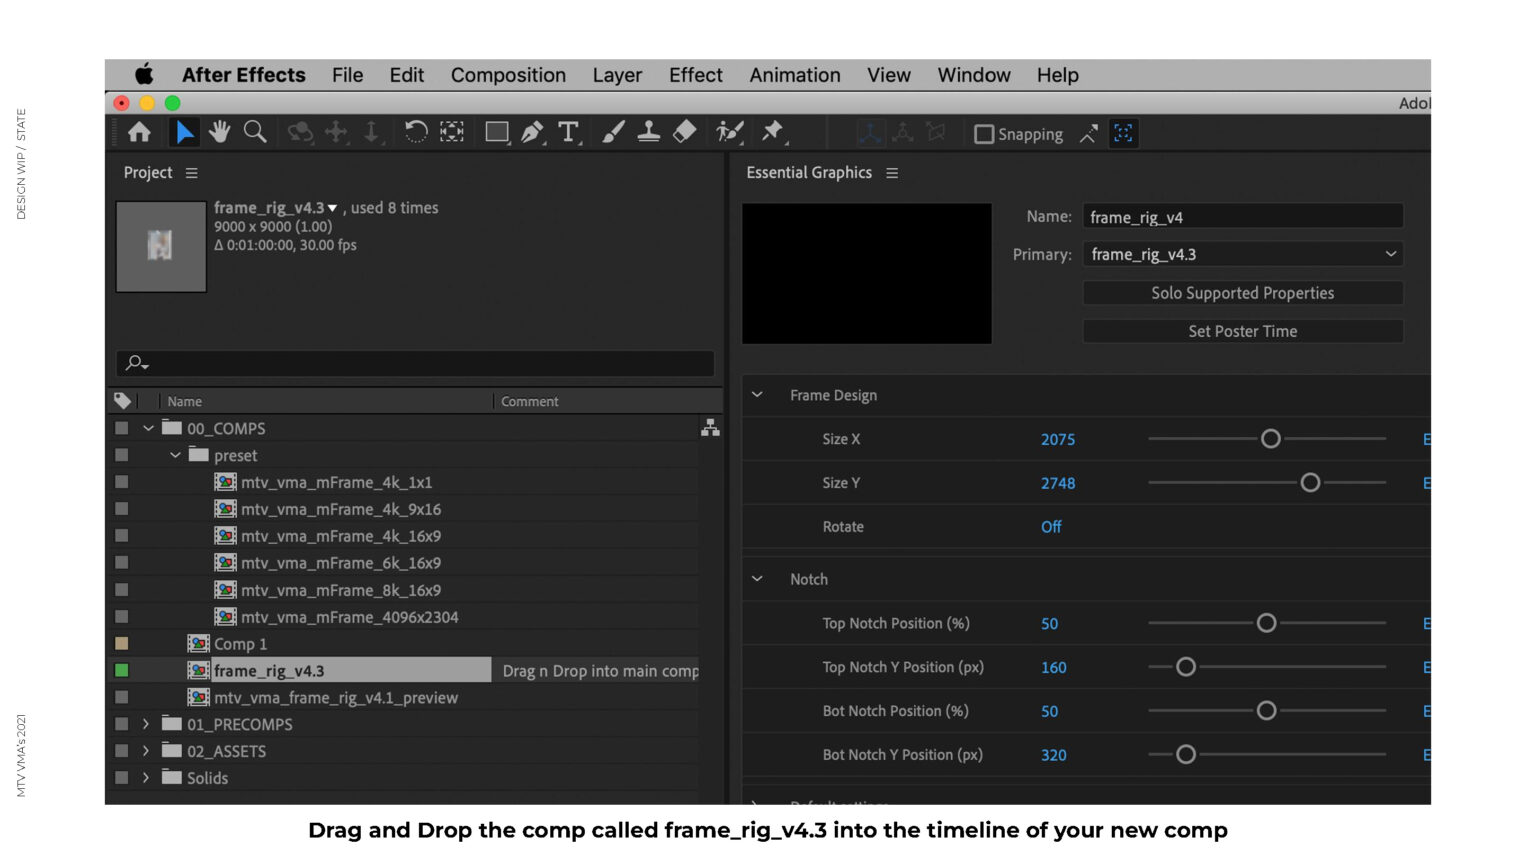
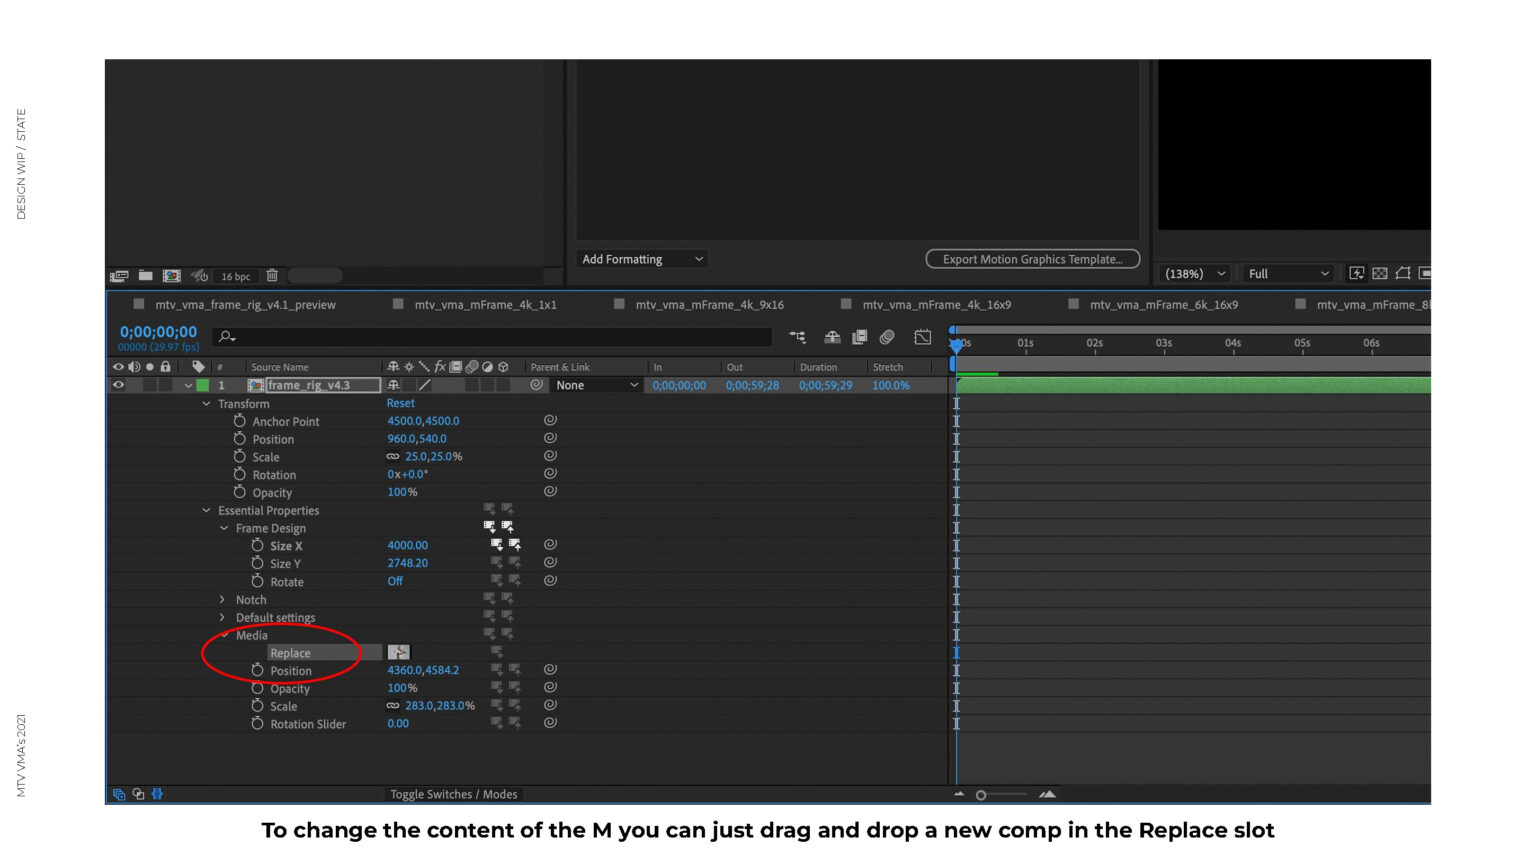
- Replacement of media within the frame — The content within the frame can be easily replaced by dragging an image/video/composition onto the rig’s Master Property: Media> Replace
Ensuring Smooth Usage of Rig for MTV Team and Clients
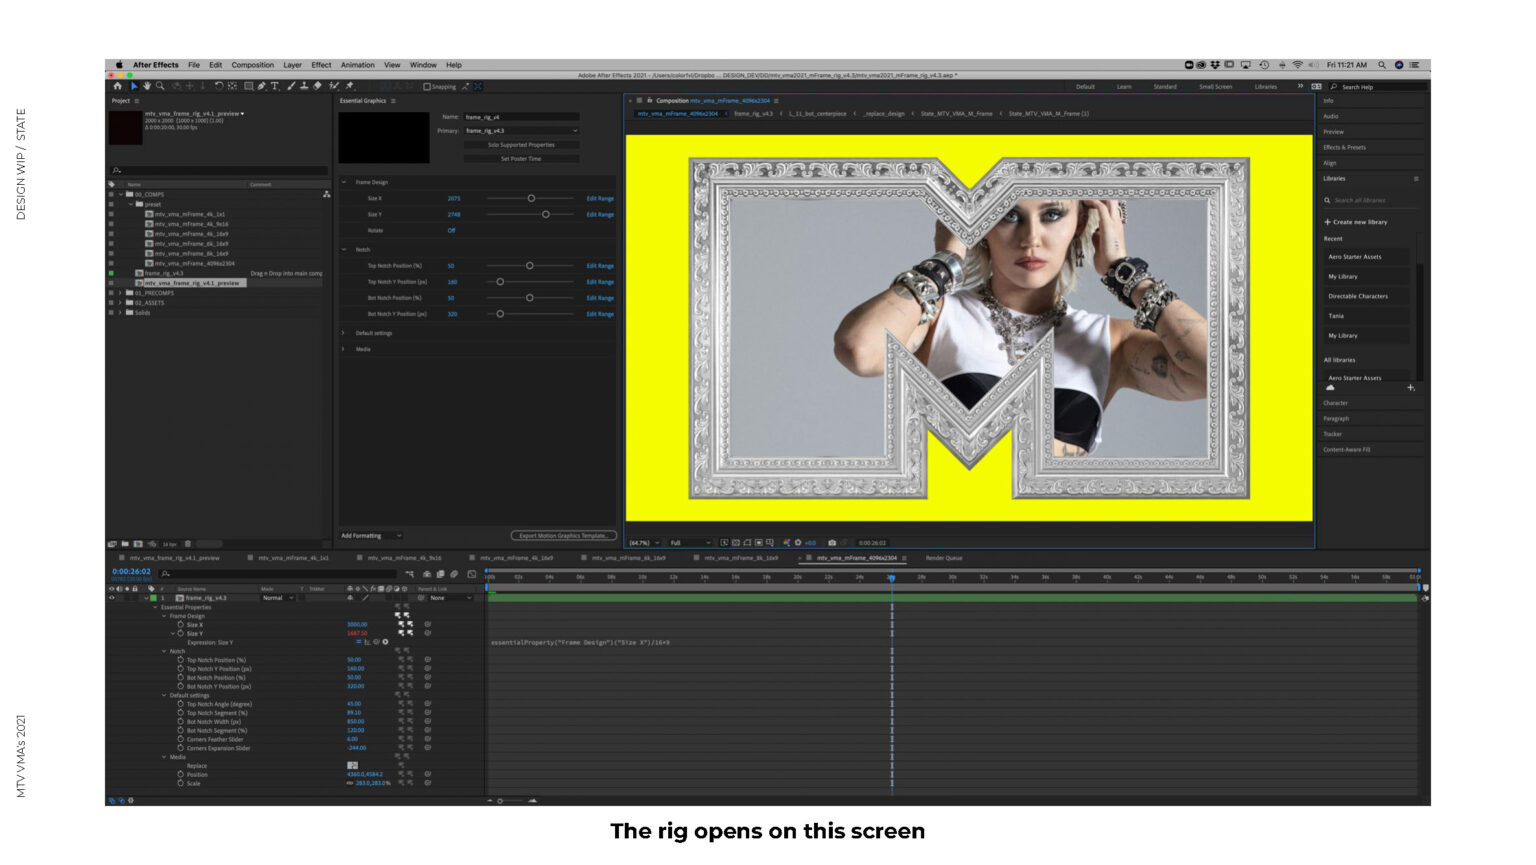
As part of the project, I collaborated with the team at STATE Design to create a tutorial document for the MTV team to reference when using the rig. The aim was to ensure that the animators at MTV could comfortably use the setup without encountering any issues. To further aid the team and clients in understanding the rig, we took the following steps:
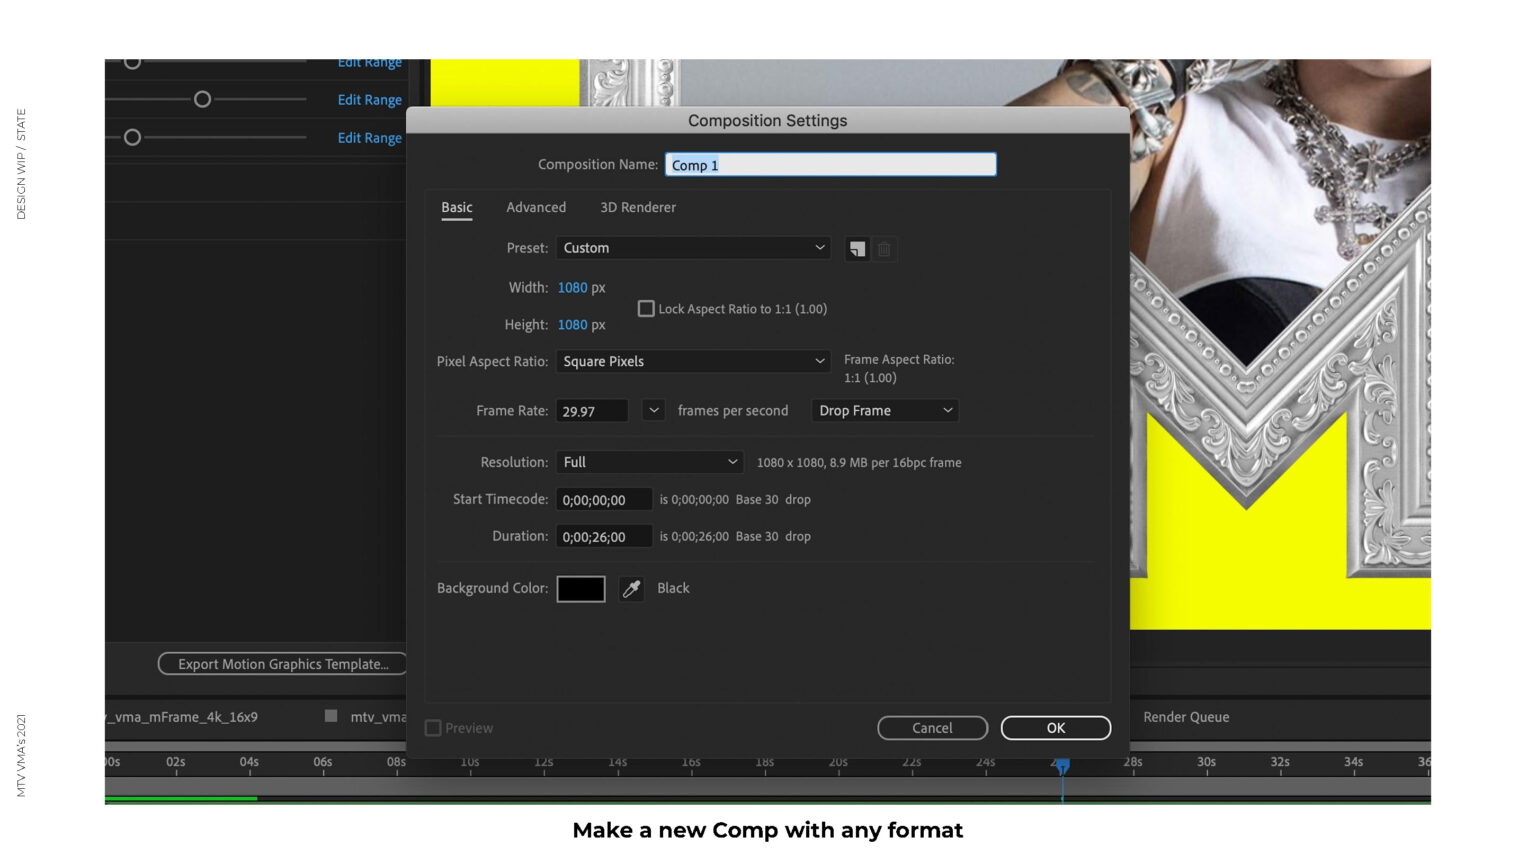
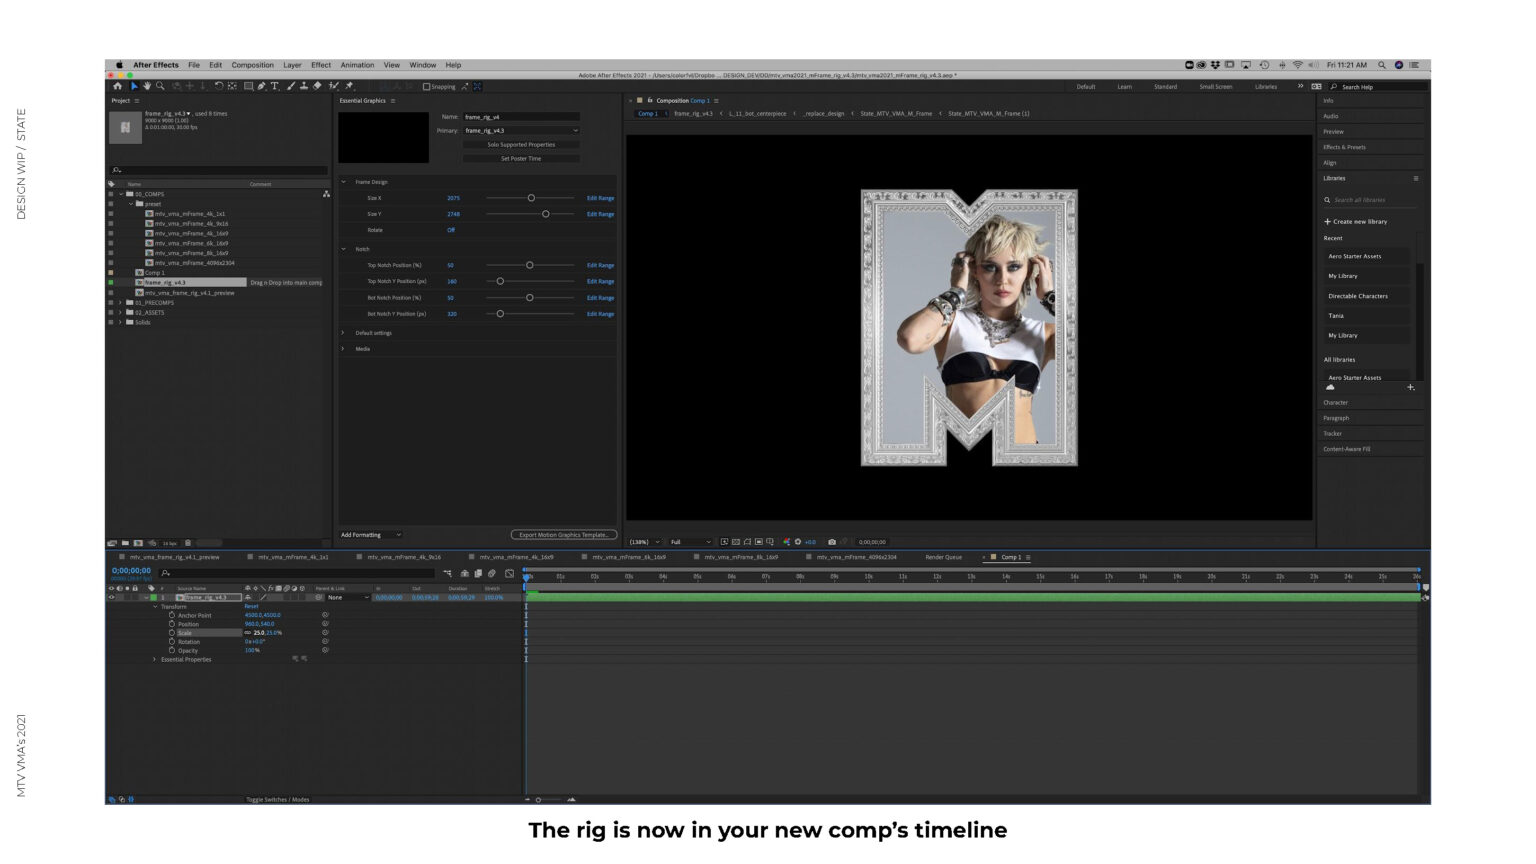
We prepared a detailed read-me or instructional guide, including pictorial representations to make it as clear as possible. It was essential to ensure that we did not assume that everyone had prior knowledge of the rig.
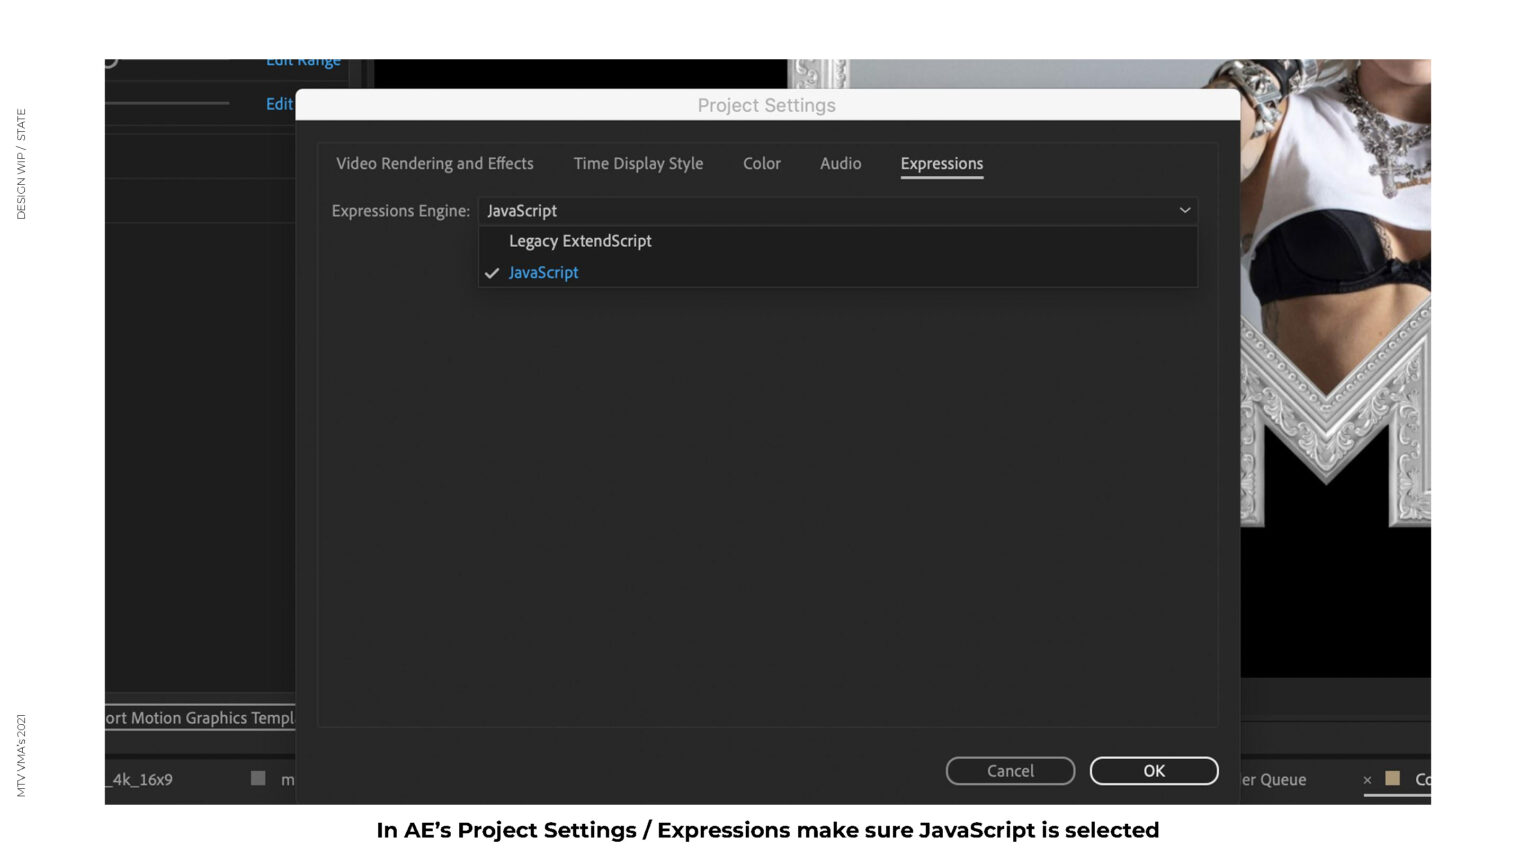
We took into account potential compatibility issues, as clients or external partners may be using an older version of After Effects that could generate errors when opening a rig created with a more recent version.
We conducted tutorial demos with the clients to provide hands-on guidance and support in using the rig effectively.
As a producer, project manager, or creative/art director, effective communication with the team and clients is crucial in ensuring the success of a project. In this project, our main challenge was to communicate how the rig works and to help everyone involved in using it with ease. Through the above efforts, we were able to address this challenge successfully.

Process
Workflow
To create the ‘M’ frame shape, a shape layer was created using expressions to generate paths. A base rectangle was established and pointsOnPath was used to interpolate between the base rectangle with normalized values on the sides to create segmentation. The process was repeated for the bottom notch, resulting in a rig that can be seen in the animated image of the skeleton and frame attachment.
The frame can be divided into various components, including corners, moldings, and top and bottom center notches. Normalization was crucial to ensure consistency and seamlessness in snapping parts together during the frame assembly process. This was achieved by pre-composing corners at an angle, rotating them to align with the comp’s edge, and then rotating them back to their original orientation in the main comp.
To simplify the process of creating the ‘M’ shape path, an expression was used instead of writing a long algorithm. The steps involved creating a rectangle shape path as the foundation, drawing the base of the notches on the top and bottom of the rectangle shape path using pointOnPath, and drawing a line between each notch triangle to attach the middle seams with finer controls.
createPath — Rectangle
					x = effect("Size X")("Slider");
y = effect("Size Y")("Slider");
vertices = [[-x/2,-y/2], [x/2,-y/2], [x/2,y/2],[-x/2,y/2]];
inTangents=[]
outTangents=[]
closed = true;
createPath(vertices,inTangents, outTangents, closed);
Bottom Notch 1
					// Define the target path
var tgtPath = content("Rectangle 1").content("Path 1");

// Define the size of the rectangle based on the values of the "Size X" and "Size Y" sliders
var size = [effect("Size X")("Slider"), effect("Size Y")("Slider")];

// Calculate the total diameter of the rectangle
var diameter = size[0] * 2 + size[1] * 2;

// Calculate the position of the control point based on the "Bot Notch Position" slider value
var ctrlPoint = (100 - effect("Bot Notch Position (%)")("Slider")) * size[0] / diameter + 50;

// Define the y position of the bottom notch based on the "Bot Notch Y Position" slider value
var y = effect("Bot Notch Y Position (px)")("Slider");

// Define the segment value of the bottom notch based on the "Bot Notch Segment" slider value
var seg = effect("Bot Notch Segment (%)")("Slider");

// Calculate the adjacent value if the angle is known
var adj = effect("Bot Notch Width (px)")("Slider");

// Calculate the percentage of the first and third points
var p1Pct = ctrlPoint;
var p3Pct = ctrlPoint;

// Calculate the positions of the points
var p1 = tgtPath.path.pointOnPath(p1Pct % 100 / 100) - adj / 2;
var p1Mid = p1 - [0, seg];
var p2 = tgtPath.path.pointOnPath(ctrlPoint % 100 / 100);
p2 += [0, -y];
var p3 = tgtPath.path.pointOnPath(p3Pct % 100 / 100) + adj / 2;
var p3Mid = p3 - [0, seg];

// Create the shape path
createPath([p1, p1Mid, p2, p3Mid, p3], [], [], 1);
Bottom Notch 2
					// Define target path
var tgt = content("botNotch_1").content("Path 1").path;

// Calculate percentages
var seg = effect("Bot Notch Segment (%)")("Slider") / 2;
var p1Pct = seg / 100;
var p2Pct = (100 - seg) / 100;

// Calculate points on path
var p1 = tgt.pointOnPath(p1Pct);
var p2 = tgt.pointOnPath(p2Pct);

// Create shape with points
createPath([p1, p2], [], [], 0);
Top Notch 1
					// user variables
var tgt = content("Rectangle 1").content("Path 1");
var size = [effect("Size X")("Slider"), effect("Size Y")("Slider")];
var diameter = size[0] * 2 + size[1] * 2;
var ctrlPoint = effect("Top Notch Position (%)")("Slider") * size[0] / diameter; // normalize from 0 to 100 on top
var y = effect("Top Notch Y Position (px)")("Slider");

// calculate adjacent if angle is known
var adj = y / Math.tan(degreesToRadians(90-effect("Top Notch Angle (degree)")("Slider")));
var adjPct = adj/size[0]* (size[0]/diameter) * 100;

// calculate pts %
var p1Pct = ctrlPoint - adjPct;
var p3Pct = ctrlPoint + adjPct;

// create points
p1 = tgt.path.pointOnPath(p1Pct % 100 / 100);
p2 = tgt.path.pointOnPath(ctrlPoint % 100 / 100);
p2 += [0, y]
p3 = tgt.path.pointOnPath(p3Pct % 100 / 100);

// create shape
createPath([p1, p2, p3], [], [], 0);
Top Notch 2
					// User variables
var tgt = content("topNotch_1").content("Path 1").path;
var seg = effect("Top Notch Segment (%)")("Slider") / 2;

// Calculate points percentage
var p1Pct = seg / 100;
var p2Pct = (100 - seg) / 100;

// Calculate points on path
p1 = tgt.pointOnPath(p1Pct);
p2 = tgt.pointOnPath(p2Pct);

// Create shape
createPath([p1, p2], [], [], 1);
Attaching components to path
					// get point on path
var myPath =thisComp.layer("control_skeleton").content("topNotch_2").content("Path 1").path;
var n = clamp(effect("point")("Slider"),0,myPath.points().length-1);
var pos = myPath.points()[n];

// convert to world space
thisComp.layer("control_skeleton").toWorld(pos)+[0,effect("y_offset")("Slider")]
					// get point on path
var myPath = layer.content.path;
var n = clamp(Slider Control,0,myPath.points().length-1);
var pos = myPath.points()[n];

// convert to world space
layer.toWorld(pos);
This select the point on a target layer’s path and convert it to world space to be used as a position coordinates.
Credits
Production Studio: STATE Design
Producers: Ricardo Arashiro, Krissy Estrada
Technical Artist: Desmond Du
3D Designer: Lamek Felix